


So I was looking through my blog and realized that I started it after pumpkin roll season!
I'm going to Bunco this Friday (unless we don't have enough people) and I'm going to be making that... So I'll have to show my step-by-step! (I think I actually already have pics of this)
Also, I was doing the whole project thing, in reality I probably succeeded in doing the projects, I just didn't blog about them. Which I've admitted I'm horrible at keeping up with.
This month is super busy!
I'll be making cupcakes the following weekend for my niece & nephew's birthday party. The day before that I'm going to an adult's Birthday party. And the weekend after (well not quite) I head to California! (Disneyland)
Plus work in between.
I had to bow-out of some stuff just so I wouldn't over-do it before the long drive!
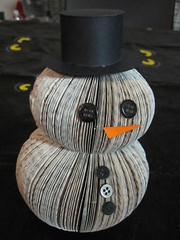
I made another snowman. This time I put the stencil all the way to the bottom (so that I don't cut the bottom of the book, it remains flat...) I'll update the last post!
Tuesday, October 11, 2011
Friday, October 7, 2011
Book Snowman

Summers over (thank goodness) and now I'm in a crafty mood again!
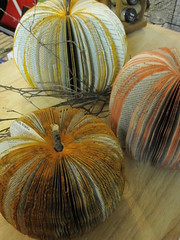
I found this book pumpkin tutorial on pinterest from Craftberry Bush and promptly headed to pick up some books with my mom so we could try it out.
It ended up that I enjoyed it much more than her.
I made my first three, boy did my hand hurt after that!
Then my neighbor asked me to make her some and gave me two books. I whipped out the dremel for those!

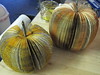
And even with the burnt edges they looked super cute.
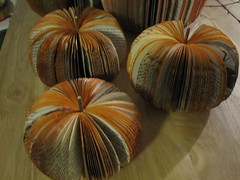
I also made mini ones!
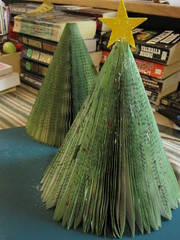
I then had the idea to make trees...
and finally, today while browsing pinterest and seeing them over and over I had the idea of a snowman!
Book Snowman
Materials:
- book (more pages=fuller end result)
- scissors
- card board
- xacto knife (possibly a box cutter)
- glue gun (or other glue if you're more patient - I am not.)
- stick/dowel
- white paint + water
- paint brush
- scrap paper for had
- scrap fabric for scarf
- tiny piece of paper for nose
- buttons
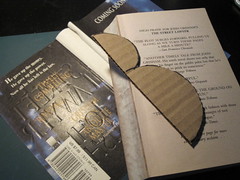
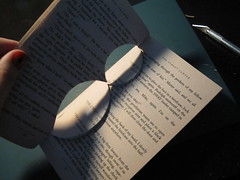
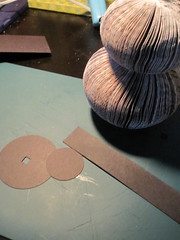
First you'll cut out your snowman shape, I used to circular things and traced half of them onto the cardboard, then cut it out
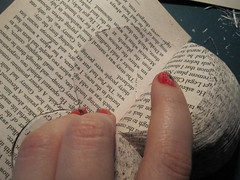
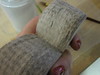
Remove the cover of the book and hold the cardboard near the spine and trace with your xacto knife
(Update: I made a 2nd snowman and cut the bottom of the cardboard template flat and put that against the bottom of the book, so when you cut you're only cutting into the spine of the book once, leaving a flat bottom)
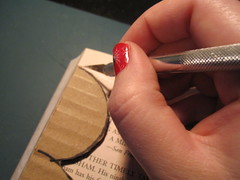
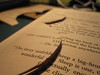
After I've got through a few pages I remove the cardboard and just use the lines I've already made.
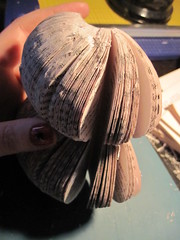
When you get a good amount of your knife in there you'll be able to remove some of the excess.
Keep going!
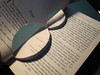
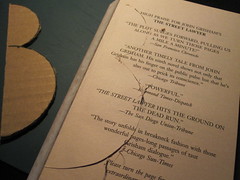
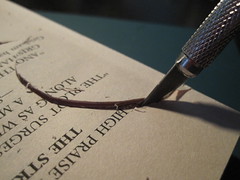
It can start to get harder because the previously cut stuff getting in your way.
So I move some of it over (being careful not to fold too hard and snap the spine)
almost there!
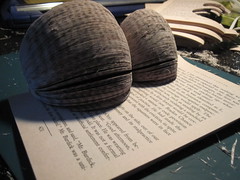
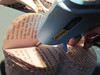
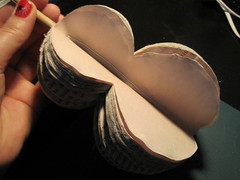
The cutting is done! Now youll want to go through and crease the spine so that itll flare out nicely. Youll then notice that the front and the back of the book doesnt match!
Thats OK, its the back of the snowman anyway.
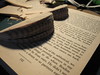
Now for the assembly
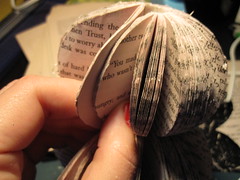
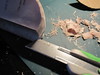
If your books spine has weak spots and is splitting like this:
you can run a line of glue down the inside and hold it closed til dry (this is why I use the hot glue gun)
One thing I hadn't thought about until I was done was that I didn't make the bottom flat! So I corrected that (this was my first snowman so you get to see my mistakes too)
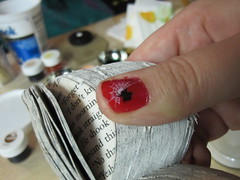
Now for the paint...
I wandered around my house for a while because I don't actually have paint. I used food coloring for the pumpkins and trees.
Then *bing* I remembered my friend had left a whole gallon of white paint at my house for a project I helped him with (over a year ago!)
I put some in a container and mixed it with water. You want to paint to show, but not make the pages stick.
I put quite a few layers on, fanning out the pages in between. (I didn't let them dry, just added to it)
Time for the stick, this helps with support. When you bend the book around the stick it should just fit the stick.
Glue the spine and one of the pages.
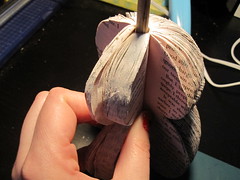
Now you'll notice the back has a lot of gapping. I use the same idea as before where I run some glue along the inside. This helps with the major gapping.
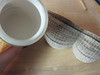
Accessorizing!
I used two circles and a strip for the hat.
(the hole in the big circle is so it fits through the stick - I did not glue the hat to the snowman)
I added eyes, buttons, and a nose... but still felt like something was missing...
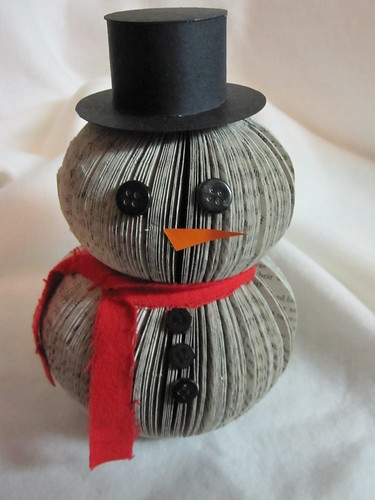
A scarf!
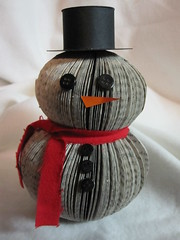
And there he is folks!
Saturday, March 26, 2011
Chocolate Cupcakes w/ Strawberry Swiss-Meringue Buttercream
Strawberries were on sale the other day when I went to the grocery store so I thought it would be the perfect time to try this recipe from pinkparsley.
Got all my stuff together for the cake part
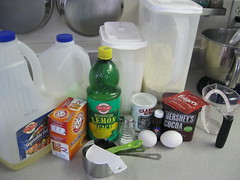
(I'm not a coffee drinker but happened to have a packet of instant)
Got it all mixed together then added the coffee and got a bit worried... it was SO THIN.
But then as the recipe calls for I mixed it with a spatula a bit and went with it, they ended up baking perfectly.
Then came the frosting...
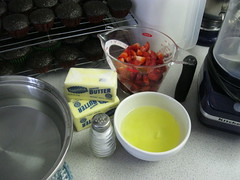
I've never done one of those stove top sugar egg white frostings before so I was a tad worried I'd mess it all up... I mixed and mixed and mixed while it was over the heat, and it just want getting completely 'smooth' between my fingers. So I decided it looked good and went on! (ok, so maybe I'm impatient)
It ended up coming together nicely!

I've already delivered to 3 of my neighbors and had 3 mini ones myself! I just dropped them off so I'm not sure what they think of them yet. I REALLY like them, def. making again.
Got all my stuff together for the cake part
(I'm not a coffee drinker but happened to have a packet of instant)
Got it all mixed together then added the coffee and got a bit worried... it was SO THIN.
But then as the recipe calls for I mixed it with a spatula a bit and went with it, they ended up baking perfectly.
Then came the frosting...
I've never done one of those stove top sugar egg white frostings before so I was a tad worried I'd mess it all up... I mixed and mixed and mixed while it was over the heat, and it just want getting completely 'smooth' between my fingers. So I decided it looked good and went on! (ok, so maybe I'm impatient)
It ended up coming together nicely!
I've already delivered to 3 of my neighbors and had 3 mini ones myself! I just dropped them off so I'm not sure what they think of them yet. I REALLY like them, def. making again.
Monday, March 14, 2011
Biscuits and Papa Haydn
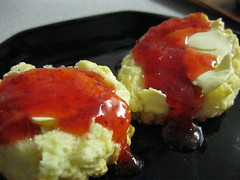
I made biscuits for the first time in my life the other day (minus helping mom when I was a wee one). I find this very strange since I love baking... and I love biscuits!
I found a super easy recipe during my online food hunting at 'and now for something completely delicious'. It took about 5 minutes to prepare (partly thanks to the butter moosher my mom gave me - its actually almost the same one as in the pic of that blog) then like 10 minutes to bake.
I made mine a bit smaller and ended up with 12, I also did the milk + lemon thing since I almost never have buttermilk on hand.
mmmmm - topped with home made strawberry jam from a friend.
And now for the Papa Haydn portion!
This was mom and my 2nd stop for our Treat Tasting. I already knew one treat I liked at Papa Haydn's, but I hadnt actually tried anything else.
They also serve food so when we got there we were very nicely greeted to be seated but let them know we were only on a mission for the treats!
The guy behind the nom case was very pleasant and patient. We looked at everything. One thing I LOVE is that the treats in the display case are the ones they serve, so most of the time they are already cut into so you get to see all the inner goodness.
I asked if I could take a picture and he said 'of course!' It was pretty sunny so theres some glare. The treat we decided on isnt in the picture because just as we made up our minds another person ordered it so he had already removed it.

All the goodies have little name-tags with the price on them.
We decided on:
Autumn Meringue
Swiss meringues layered with rich chocolate mousse and pot de creme, wrapped in ribbons of chocolate.

(image from their website)
The grading was hard... because I already have love for another one of their treats which I'll mention later...
So I gave it a B
It tasted great! The mousse was a wonderful smooth texture and the meringue (I only like the crunchy kind) was ACE. I dont know if I wasnt feeling like chocolate or if my other love was intruding in my taste buds. So I just couldnt give it an A. (plus I gotta give room for future sweets!)
My favorite part was the meringue... so I saved most of it for the end!
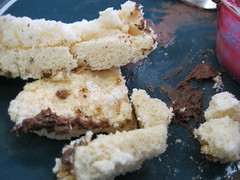
mmmm
Papa Haydn's gets an A+
The setup is perfect (I basically already mentioned all the good stuff)
I do realize that I'll probably have to recap when I have quite a few and may have to re-grade! Thinking back I dont know if I would still give Piece of Cake a C-!
Maybe I'll re-review in clumps of 5 and assess in my afterthought and other experiences.
I also see I didnt give pricing, so I'm adding that now
Piece of cake: $5.75
Papa Haydn: $8.00
Mom and I are splitting all the treats we get (if possible) so we are actually only spending 1/2 of whats listed.
My Papa Haydn love....
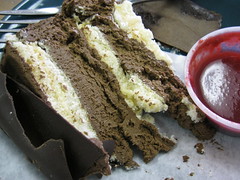
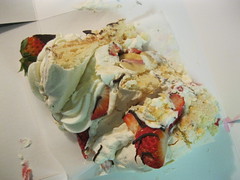
Boccone Dolce
Swiss meringues drizzled with semi-sweet chocolate, layered with fresh fruit and chantilly cream.

(image from their website)
When we walked in I didnt see it... then as I said "its not here!" it was put back into the case *phew!*

Mom and I had already decided a slice was going home with each of us... how could we go and NOT get one?!
Its not always the same as they use fresh fruit so it goes by what is available. This time (I havent actually eaten it yet I just nibbled a few bits and took pictures) it looks like theres banana and strawberry.
This one gets an A+ every time and is also $8 per slice. This is one I wont share!
may not be the prettiest treat... but that doesnt stop me!
*sigh* ily
We havent decided where we'll go next, or when! But I'm excited! (ok some of that excitement may be from knowing I have amazingness in my fridge waiting to be consumed)
I found a super easy recipe during my online food hunting at 'and now for something completely delicious'. It took about 5 minutes to prepare (partly thanks to the butter moosher my mom gave me - its actually almost the same one as in the pic of that blog) then like 10 minutes to bake.
I made mine a bit smaller and ended up with 12, I also did the milk + lemon thing since I almost never have buttermilk on hand.
mmmmm - topped with home made strawberry jam from a friend.
And now for the Papa Haydn portion!
This was mom and my 2nd stop for our Treat Tasting. I already knew one treat I liked at Papa Haydn's, but I hadnt actually tried anything else.
They also serve food so when we got there we were very nicely greeted to be seated but let them know we were only on a mission for the treats!
The guy behind the nom case was very pleasant and patient. We looked at everything. One thing I LOVE is that the treats in the display case are the ones they serve, so most of the time they are already cut into so you get to see all the inner goodness.
I asked if I could take a picture and he said 'of course!' It was pretty sunny so theres some glare. The treat we decided on isnt in the picture because just as we made up our minds another person ordered it so he had already removed it.
All the goodies have little name-tags with the price on them.
We decided on:
Autumn Meringue
Swiss meringues layered with rich chocolate mousse and pot de creme, wrapped in ribbons of chocolate.
(image from their website)
The grading was hard... because I already have love for another one of their treats which I'll mention later...
So I gave it a B
It tasted great! The mousse was a wonderful smooth texture and the meringue (I only like the crunchy kind) was ACE. I dont know if I wasnt feeling like chocolate or if my other love was intruding in my taste buds. So I just couldnt give it an A. (plus I gotta give room for future sweets!)
My favorite part was the meringue... so I saved most of it for the end!
mmmm
Papa Haydn's gets an A+
The setup is perfect (I basically already mentioned all the good stuff)
I do realize that I'll probably have to recap when I have quite a few and may have to re-grade! Thinking back I dont know if I would still give Piece of Cake a C-!
Maybe I'll re-review in clumps of 5 and assess in my afterthought and other experiences.
I also see I didnt give pricing, so I'm adding that now
Piece of cake: $5.75
Papa Haydn: $8.00
Mom and I are splitting all the treats we get (if possible) so we are actually only spending 1/2 of whats listed.
My Papa Haydn love....
Boccone Dolce
Swiss meringues drizzled with semi-sweet chocolate, layered with fresh fruit and chantilly cream.
(image from their website)
When we walked in I didnt see it... then as I said "its not here!" it was put back into the case *phew!*
Mom and I had already decided a slice was going home with each of us... how could we go and NOT get one?!
Its not always the same as they use fresh fruit so it goes by what is available. This time (I havent actually eaten it yet I just nibbled a few bits and took pictures) it looks like theres banana and strawberry.
This one gets an A+ every time and is also $8 per slice. This is one I wont share!
may not be the prettiest treat... but that doesnt stop me!
*sigh* ily
We havent decided where we'll go next, or when! But I'm excited! (ok some of that excitement may be from knowing I have amazingness in my fridge waiting to be consumed)
Tuesday, March 8, 2011
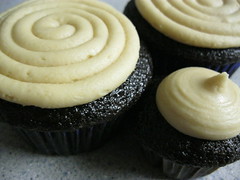
Chocolate Peanutbutter Cup Cupcakes
YUM!
I used the same chocolate cupcake recipe that I posted about before and made a peanutbutter frosting with peanut butter, powder sugar, vanilla, and milk. I would tell you how much of everything if I knew!
I put a miniature Reese's cup in the bigger cupcakes and one of the new mini ones in the tiny cupcakes. Which was the only part of this recipe that didnt go quite right... of course the Reese's fell to the bottom and stuck to the paper! oops! the good thing? They still tasted AMAZING!
This is basically what you need:
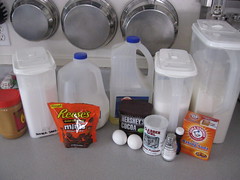
and this is what happens:
My mom just couldnt wait for Easter so invited me over last weekend to celebrate super early (we have the combined excuse that the things she got me I could USE for Easter so it only made sense to do it early!)
The loot?
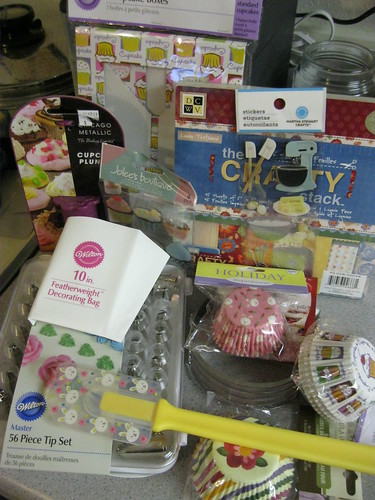
look at that amazingness!
She got me cupcake boxes for gifting to people, a piping bag, a bunny spatula, a bunch of cupcake cups!, a smoosher thing for making biscuits, craft paper, some stickers that are just tooooo cute, a cupcake plunger (for filling cupcakes), and my favorite? the 56 piece tip set! but she made it more awesome by splitting it up and instead of candy she put each tip in an egg.
Thats right, I still hunt for Easter stuff! oh so fun!
AND she finished my blanket!
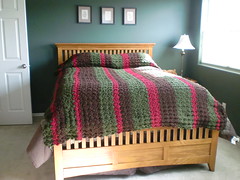
Seriously? its amazing. Thats her bed by the way. Its a queen size. I have a full.... basically I have it folded in half so the lines are horizontal on my bed and its STILL big enough for me! LOVE.
I cant post my current crafty stuff cause its for a swap. So thatll come later.
I used the same chocolate cupcake recipe that I posted about before and made a peanutbutter frosting with peanut butter, powder sugar, vanilla, and milk. I would tell you how much of everything if I knew!
I put a miniature Reese's cup in the bigger cupcakes and one of the new mini ones in the tiny cupcakes. Which was the only part of this recipe that didnt go quite right... of course the Reese's fell to the bottom and stuck to the paper! oops! the good thing? They still tasted AMAZING!
This is basically what you need:
and this is what happens:
My mom just couldnt wait for Easter so invited me over last weekend to celebrate super early (we have the combined excuse that the things she got me I could USE for Easter so it only made sense to do it early!)
The loot?
look at that amazingness!
She got me cupcake boxes for gifting to people, a piping bag, a bunny spatula, a bunch of cupcake cups!, a smoosher thing for making biscuits, craft paper, some stickers that are just tooooo cute, a cupcake plunger (for filling cupcakes), and my favorite? the 56 piece tip set! but she made it more awesome by splitting it up and instead of candy she put each tip in an egg.
Thats right, I still hunt for Easter stuff! oh so fun!
AND she finished my blanket!
Seriously? its amazing. Thats her bed by the way. Its a queen size. I have a full.... basically I have it folded in half so the lines are horizontal on my bed and its STILL big enough for me! LOVE.
I cant post my current crafty stuff cause its for a swap. So thatll come later.
Sunday, February 27, 2011
11/50 - Easter Wreath
Found a pretty wreath on whipperberry while browsing pinterest and told my mom I'd love to make some for Easter with her.
She had her paper all cut when I got to her house, however the night before I wasnt sure if I still wanted to do mine with the mod podge. So we decided to do hers the same way and mine different (and actually ended up doing hers a bit different still)
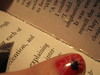
I helped her mod podge strips of paper...
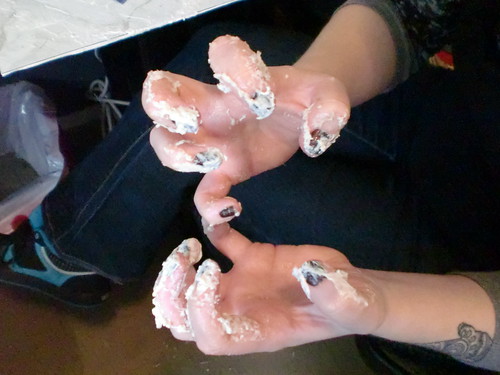
I've still got glue on my nails!
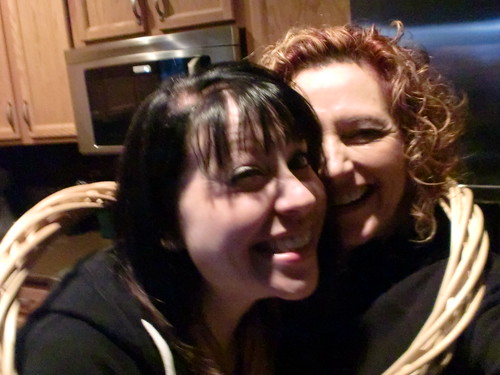
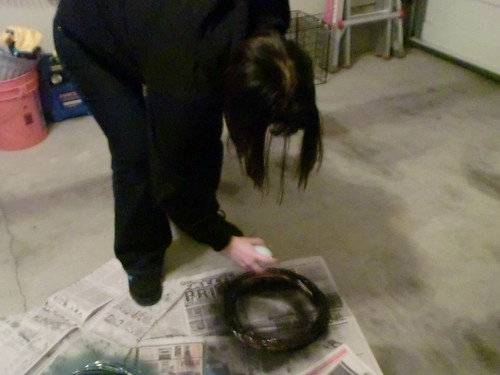
Then we needed to paint the base wreath but stopped for a pic together
Then painted
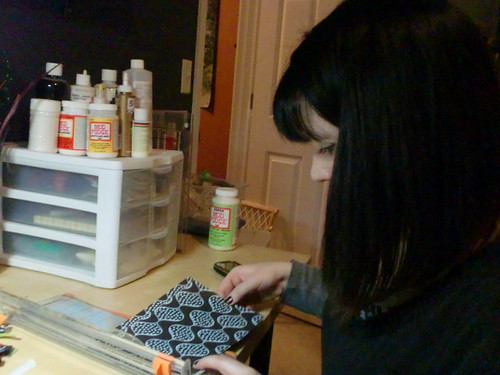
While they dried mom worked on her strips and I cut mine
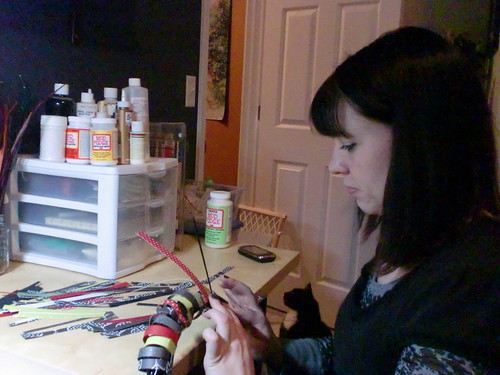
Then it was time to glue everything together YAY HOT GLUE GUNS!!
Just need to add some Easter goodness
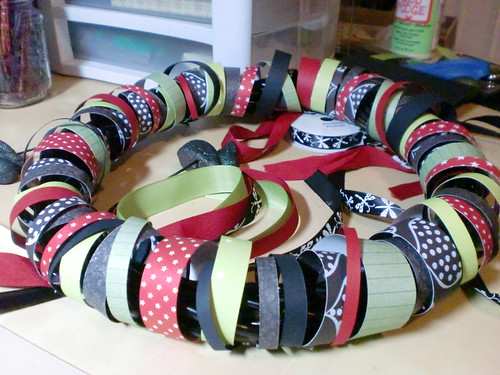
ta-da!
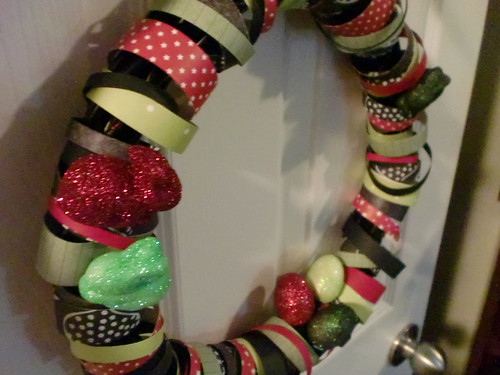
I didnt glue any of the Easter stuff in, instead I picked the colors my place is decorated with so I can use it for other holidays by just adding cute things.
I currently have it hanging in my window but will eventually have to find a better spot for it (its hard to see any detail with the lighting)
Momma started a blog and wrote about hers here.
I also made some Cream Cheese Cookies from Bake, Sew, Sing last night to contribute to dinner with my neighbors.
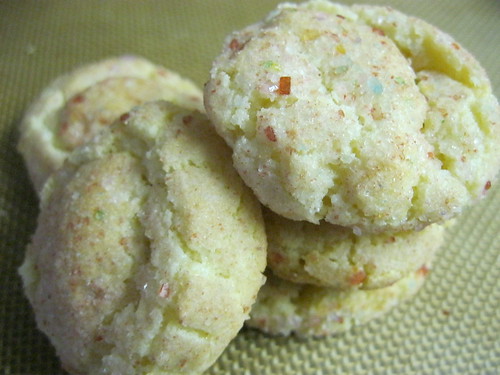
However, I didnt have quite enough sugar so I added a bit of brown sugar and ground up some fancy sugar to coat the outside of the cookies. I also added a touch of almond extract. I like how they turned out! Very moist inside and a nice crunch on the outside, I did have to bake them closer to 9 minutes though (recipe calls for 7)
She had her paper all cut when I got to her house, however the night before I wasnt sure if I still wanted to do mine with the mod podge. So we decided to do hers the same way and mine different (and actually ended up doing hers a bit different still)
I helped her mod podge strips of paper...
I've still got glue on my nails!
Then we needed to paint the base wreath but stopped for a pic together
Then painted
While they dried mom worked on her strips and I cut mine
Then it was time to glue everything together YAY HOT GLUE GUNS!!
Just need to add some Easter goodness
ta-da!
I didnt glue any of the Easter stuff in, instead I picked the colors my place is decorated with so I can use it for other holidays by just adding cute things.
I currently have it hanging in my window but will eventually have to find a better spot for it (its hard to see any detail with the lighting)
Momma started a blog and wrote about hers here.
I also made some Cream Cheese Cookies from Bake, Sew, Sing last night to contribute to dinner with my neighbors.
However, I didnt have quite enough sugar so I added a bit of brown sugar and ground up some fancy sugar to coat the outside of the cookies. I also added a touch of almond extract. I like how they turned out! Very moist inside and a nice crunch on the outside, I did have to bake them closer to 9 minutes though (recipe calls for 7)
Subscribe to:
Posts (Atom)